
Why
I really love winter hikes for their beauty, the harsh conditions, and the joy of civilization at the end of the route. In winter, there are many difficulties, one of the main ones being avalanches. I try to avoid avalanche-prone areas and build routes bypassing dangerous passes and terrain, but it's quite difficult to do this while keeping the route interesting and beautiful. What to do about this? There's only one solution: you need to be able to determine the avalanche danger of a slope. For this, I signed up for an avalanche course.
Where
After studying all the offers, I chose Mikhail Ryabchikov's course at Snowsense. There were two reasons for this.
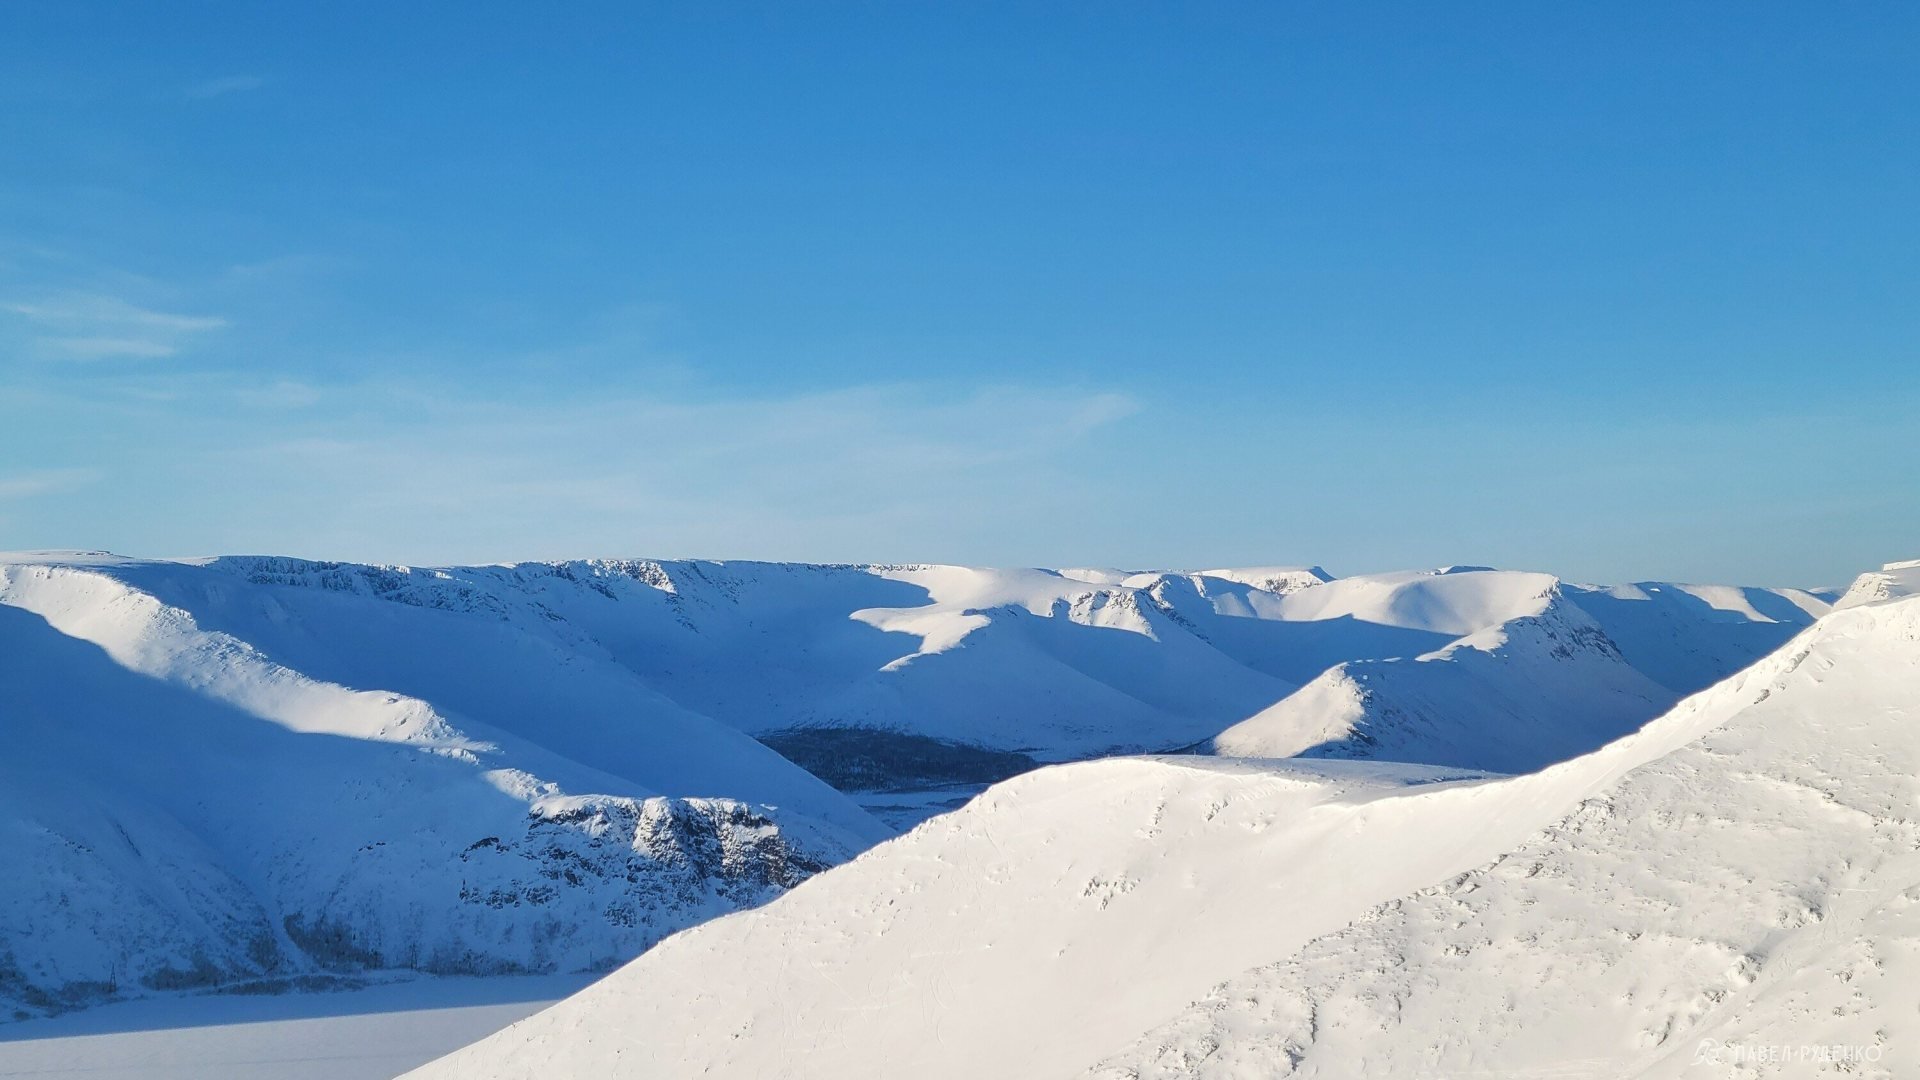
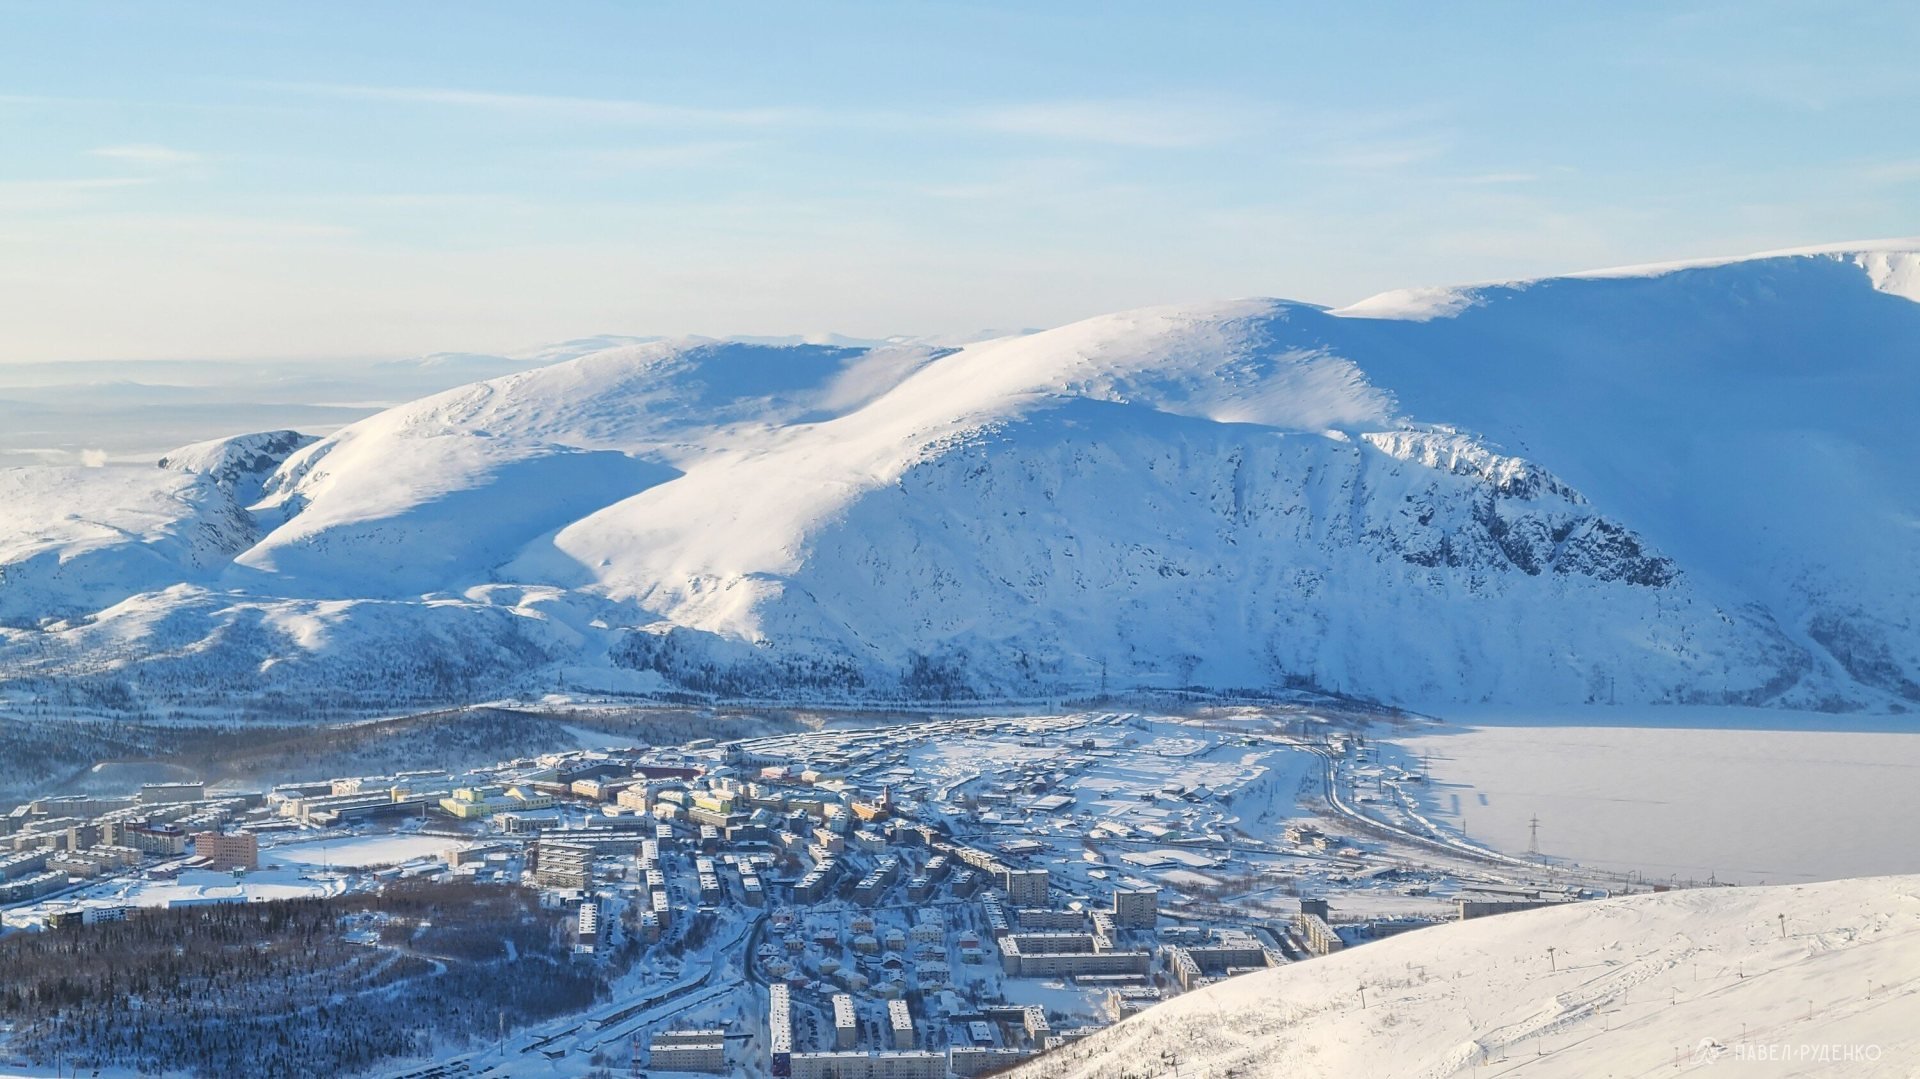
First, the course takes place in the Khibiny Mountains, and the Kola Peninsula is the main region for my ski hikes. Misha lives and works here in the municipal avalanche service, which means he knows the peculiarities of the local mountains well.
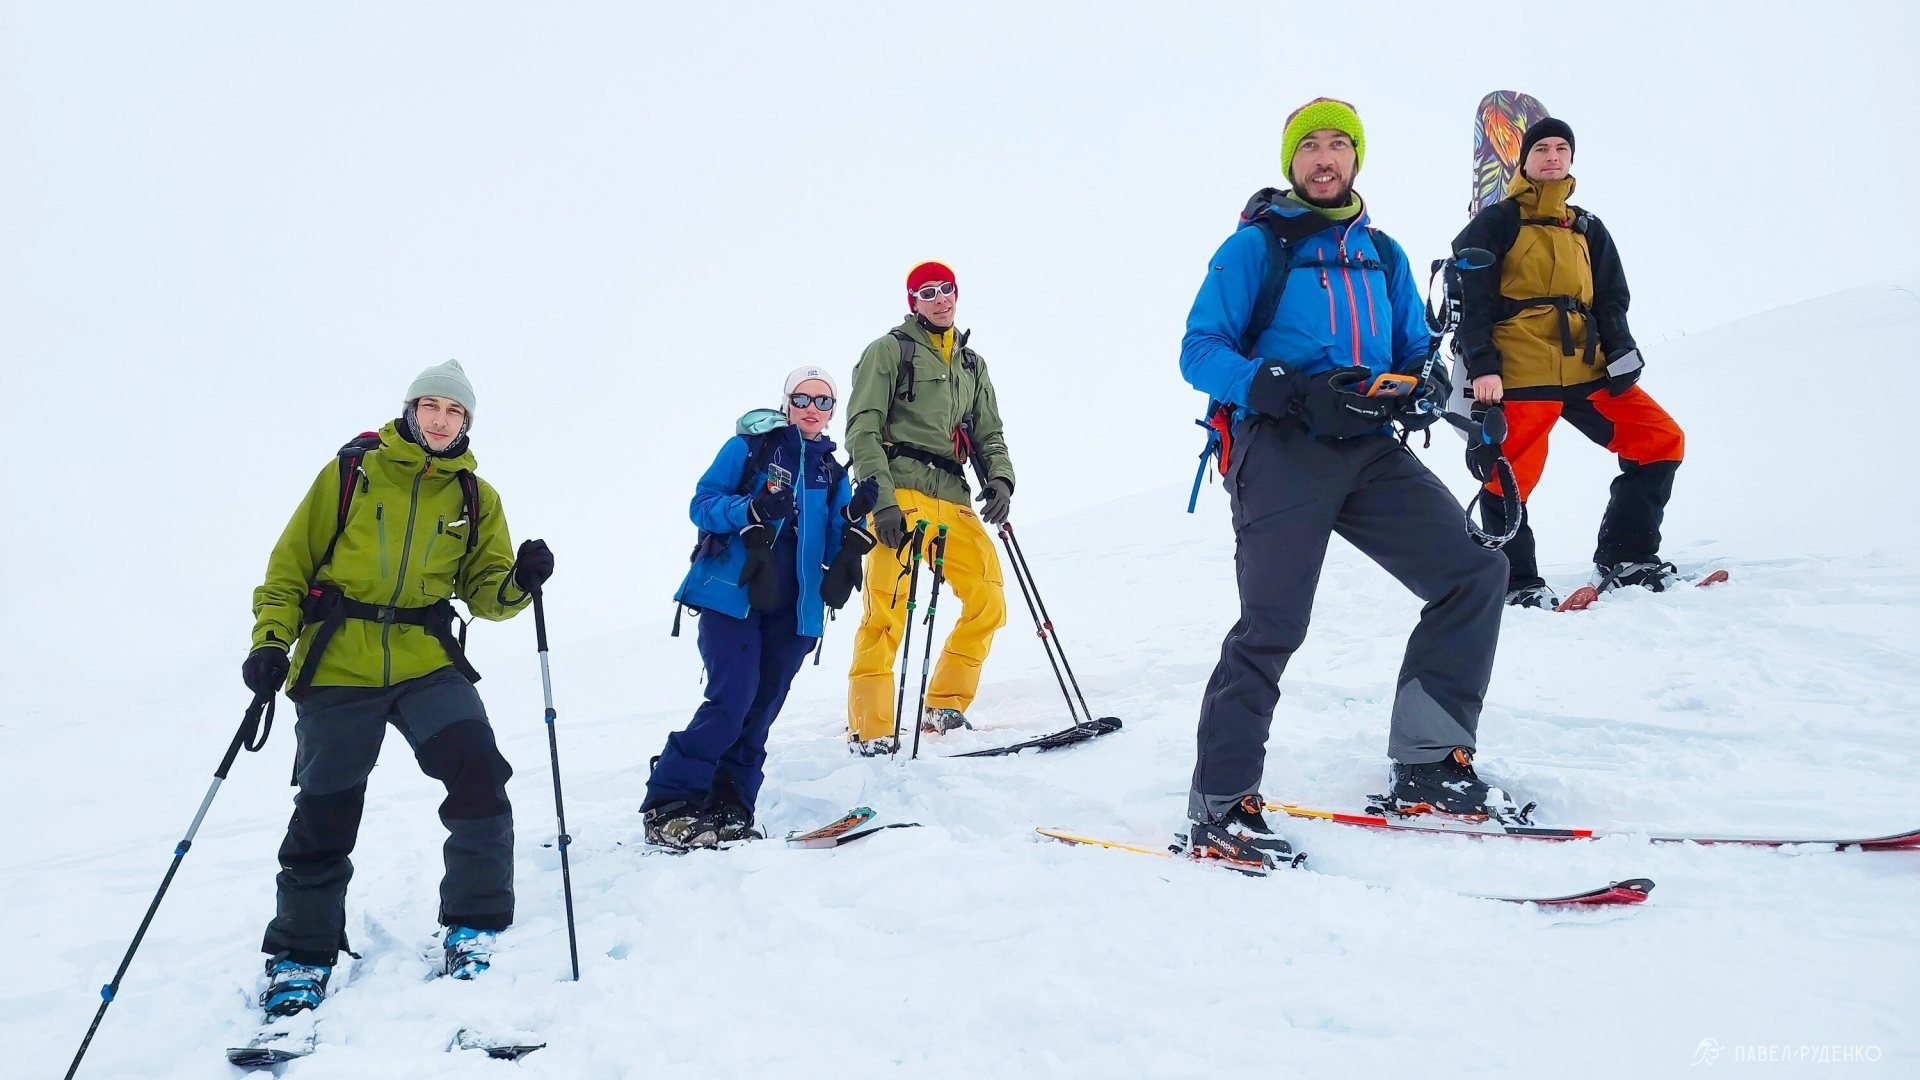
Second, the course is designed not only for freeriders but also for hikers/climbers. There is minimal skiing, and for working on the terrain during the course, you can use snowshoes or touring skis with a climbing skin.
How
The training took place in Kirovsk, in the Kukisvumchorr area, at the address: Kirova Street, 48. This is the Mountain Valley Hotel, on the ground floor of which there is a lecture hall where the theoretical part took place. Accordingly, it's more convenient to live as close as possible to this address, since the program is very tight and follows the following principle:
from 9 to 13 am — theory, then 1 hour to go home to eat, change clothes for working on the terrain, and return to the lecture hall.
from 2 to 5 pm — working on the terrain, 1 hour to eat, change clothes, and return to the lecture hall.
from 6 to 9 pm — theory and then home.
The course lasts 6 days.
Accommodation
There is enough accommodation in the Kukisvumchorr area, hostels, guesthouses, apartments. I rented an apartment in a Stalin-era building with a very enticing interior. The walls here are a meter thick, and the floor shakes from the explosions of mining minerals by Phosagro. There are local shops and Pyaterochka nearby. There's only one cafe "in the area," a specific place, so plan to cook meals at home.
Usefulness
Alternating theory and practice in the mountains helps a lot to understand how everything works in real life. There's become a noticeable increase in understanding of avalanche-prone slopes, which will allow better route planning and safer ski hikes. Below I'll give some notes that might be useful to refresh your memory, but of course, they can't replace actual training and don't serve as a guide for application. There are exceptions and nuances everywhere.
Increased avalanche danger
Deterioration of the situation when:
- More than 10mm of snow has fallen, we're already worried about the worsening avalanche situation. 30mm of snow is very dangerous. After all, a board that has come down, more than 20mm thick, is dangerous.
- Wind gusts over 7 m/s, we monitor the snow drift. Wind gusts of 8-14 m/s create strong drift at the top of the slope, on the leeward side, which is very dangerous. Wind gusts of 12-18 m/s drift lower down the slope, slightly better.
- Warming above 0C and sun. Thin cloud cover warms the snow a lot.
- After a snowstorm, which is snowfall with wind, there's a high probability of expecting a wind slab. Leeward slopes, dunes, and windslabs are dangerous. A snow flag in the air indicates snow drift.
- Rain crust + snowfall = avalanches.
- Snowpack stabilization occurs after 3 days of good weather.
Terrain
- Slope steepness is the main element in avalanche forecasting.
- Bends are tension contours, it's safer to move along the heights of the bends.
- Sparse forest is not safe. It doesn't hold the snow cover.
- A clearing is avalanche-prone by definition.
- The bottom of the couloir is safer than the sides.
- The ridge is safer than the bottom of the couloir and the sides. Look out for terrain traps.
- A visible stone is an anchor, holds the snow cover. Stones under the snow, on the contrary, initiate avalanches.
- Generally, northern exposures in winter are more dangerous, as the shady slope is colder, processes develop faster. In the Khibiny, there's no such feature, as the influence of the polar night is strong, there's too little sun.
- In spring, наоборот, the southern slopes melt faster. This is for the Northern Hemisphere, for the Southern Hemisphere, it's the other way around.
Movement
- Communication with the team, who saw the avalanche, crevasses, and other signs of an unstable cover.
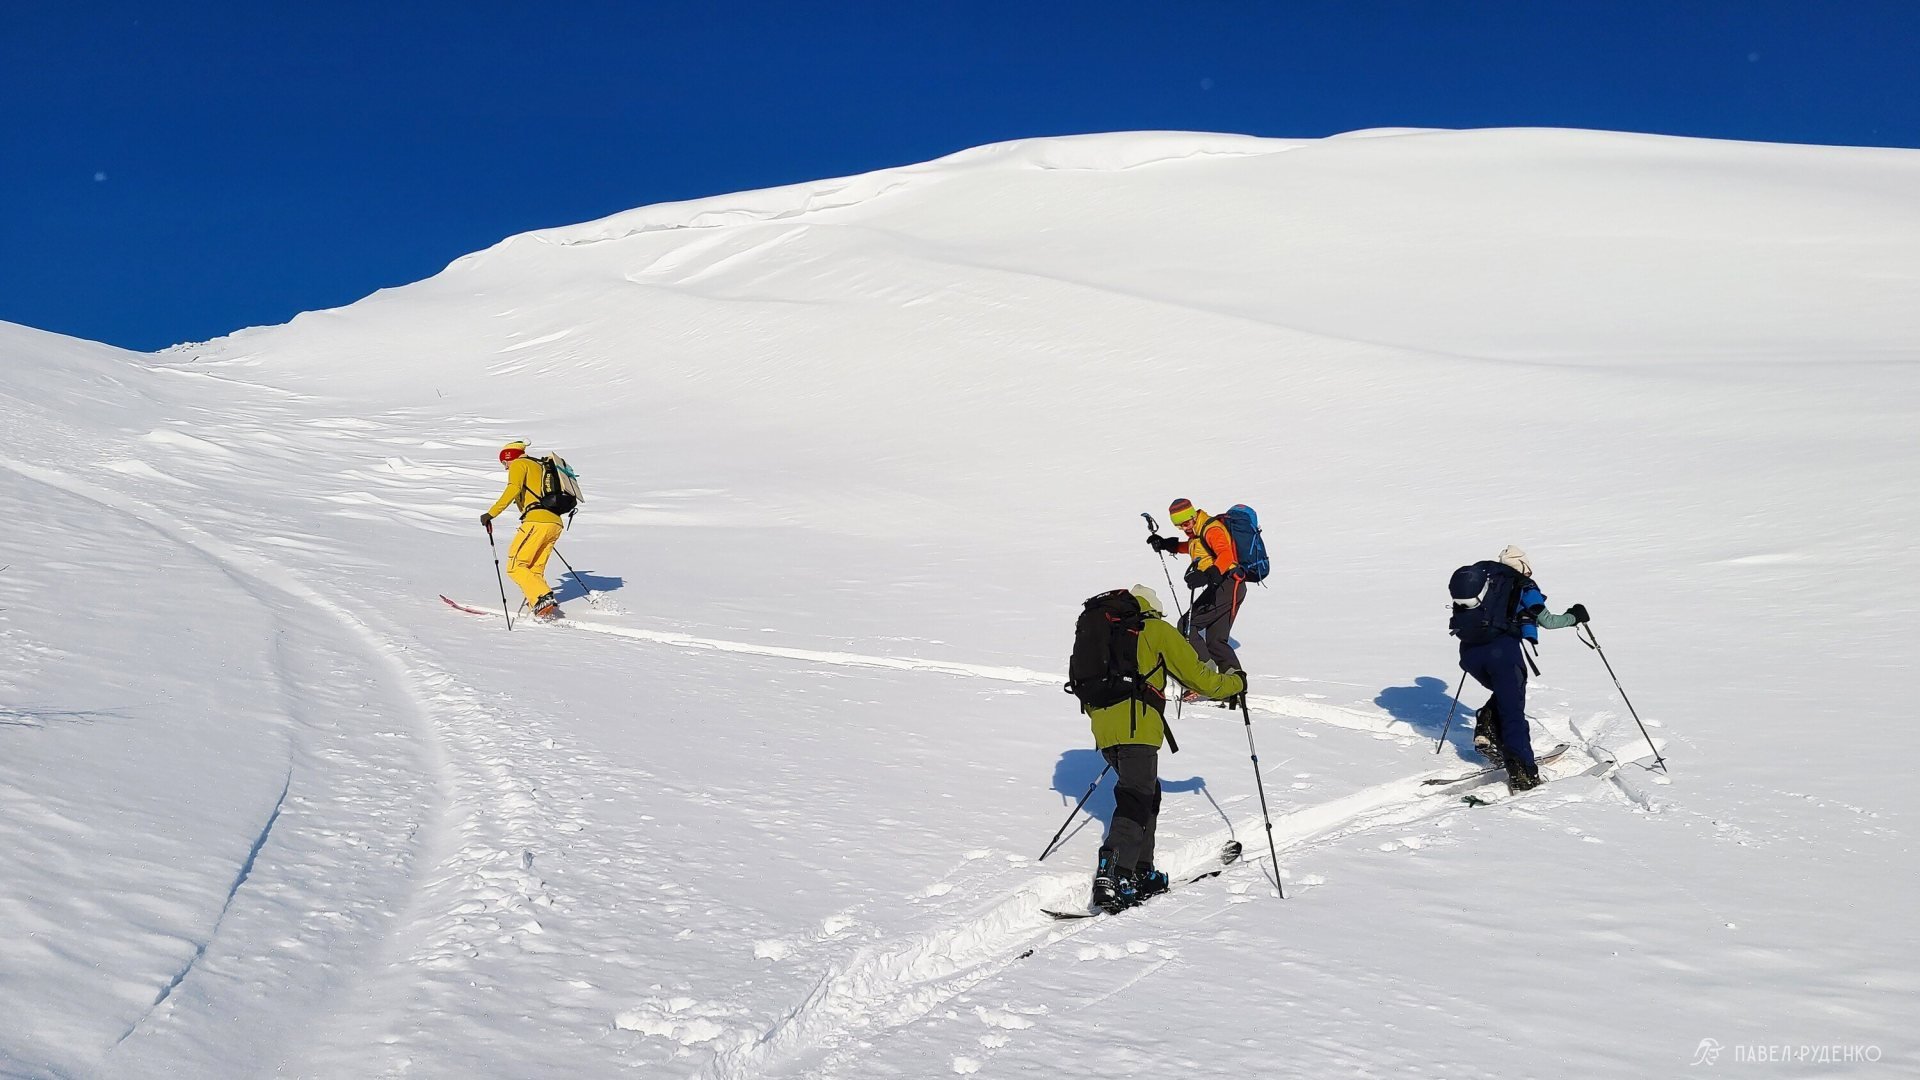
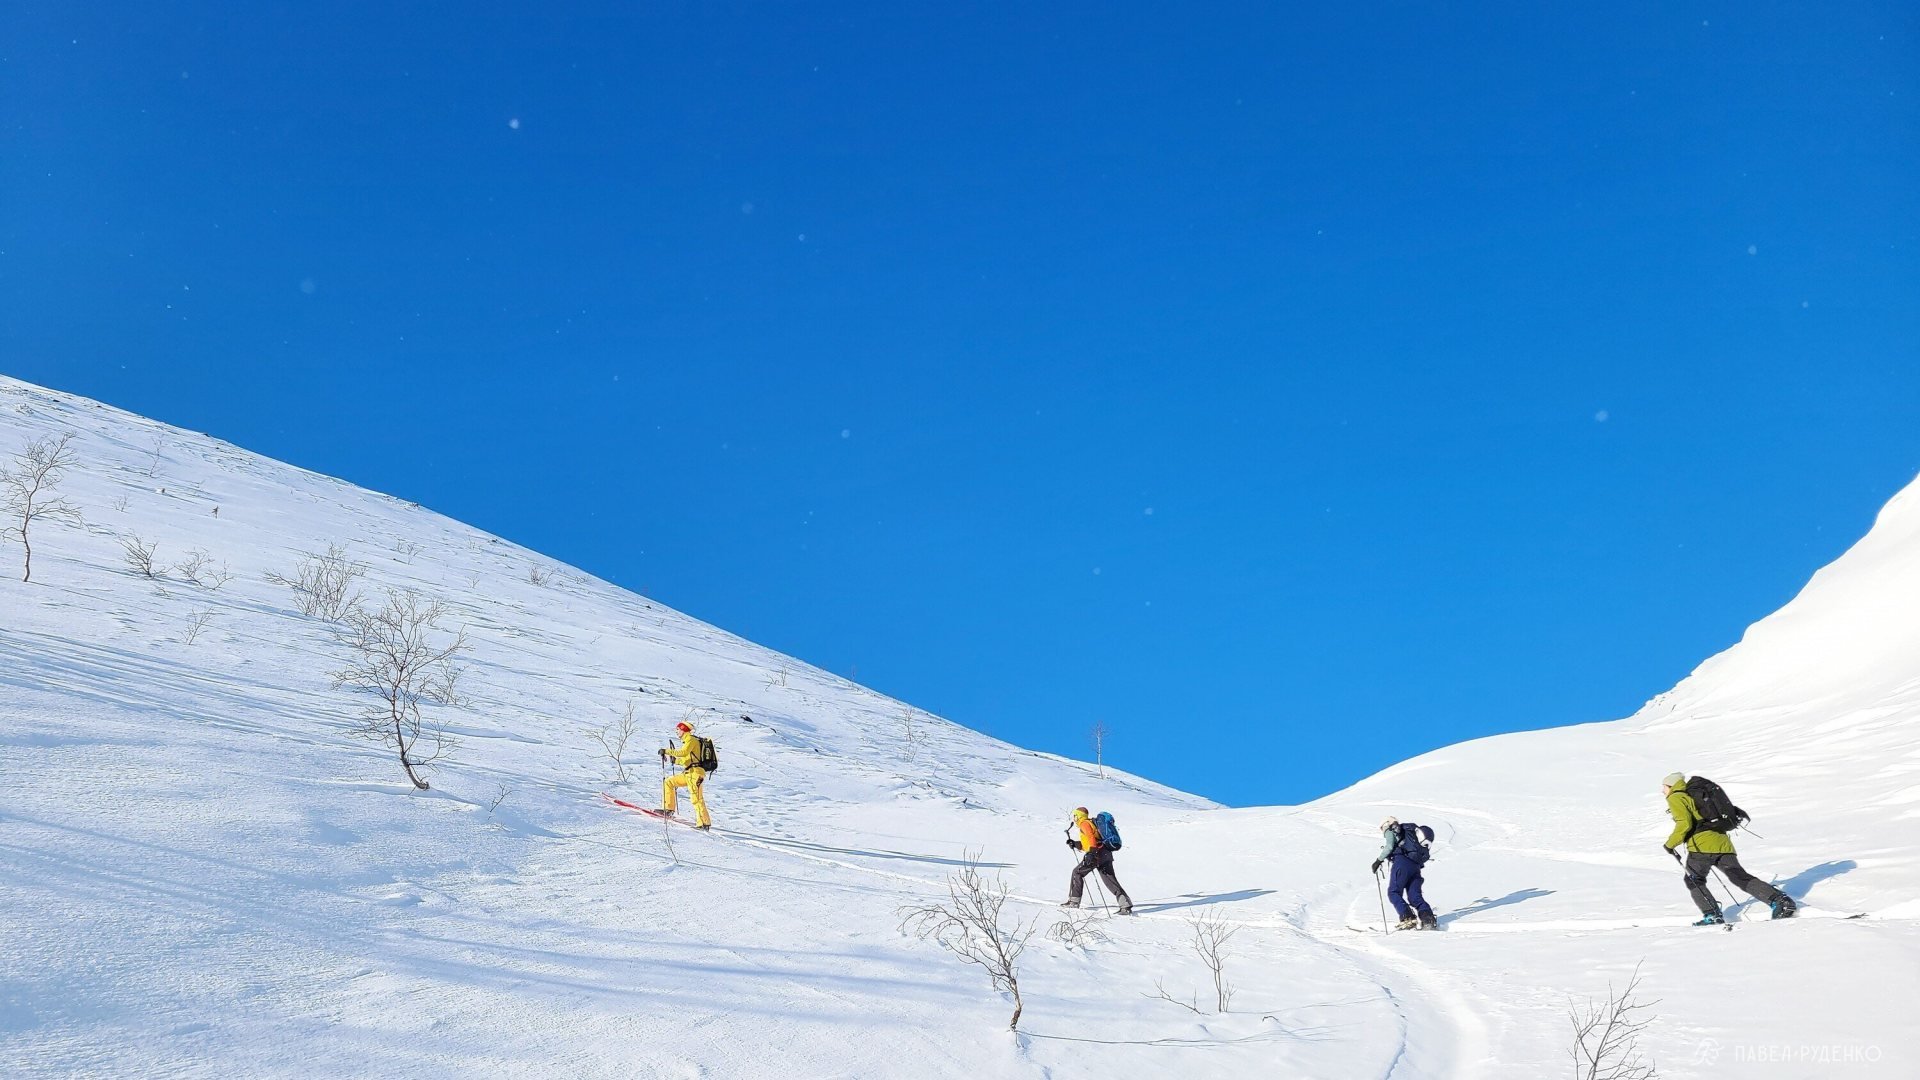
- Ascent is better up to 25 degrees, реже до 30. Build a route for the ascent, better from top to bottom, from finish to start, this makes the most logical route.
- Distance between participants — 20 meters on the slope, no stops, all tasks before the ascent.
- Move at the same pace, without gaps. Down an avalanche-prone slope, descent one by one.
Up to 25 degrees — no danger.
25 — 30 degrees — low danger. With very unstable conditions.
30 — 34 degrees — medium danger. Relatively rare slabs.
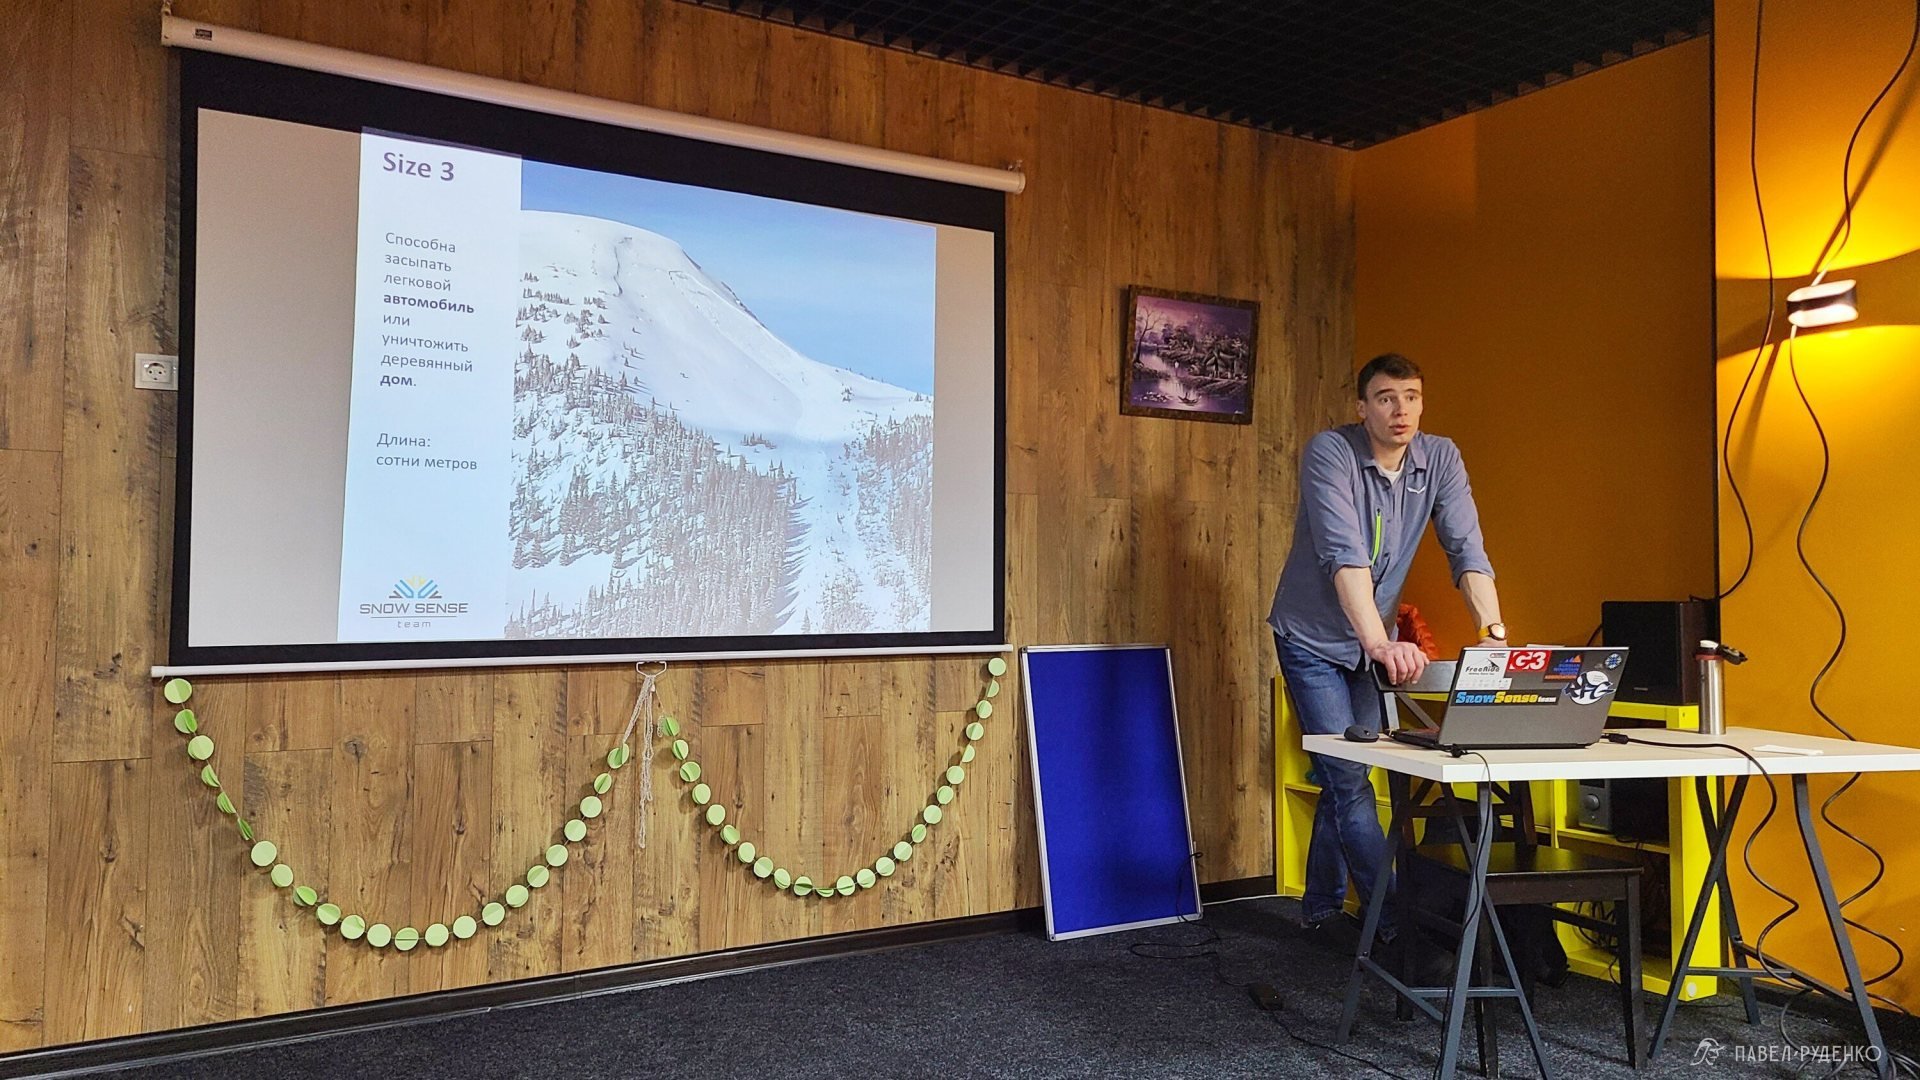
34 — 45 degrees — maximum danger, peak avalanches at 39 degrees. ¾ of the slabs go off in this range.
45 — 55 degrees — medium danger.
Signals of unstable snow:
- Appearing cracks
- Whooms, snow subsidence
- Drumming underfoot.
Avalanche gear
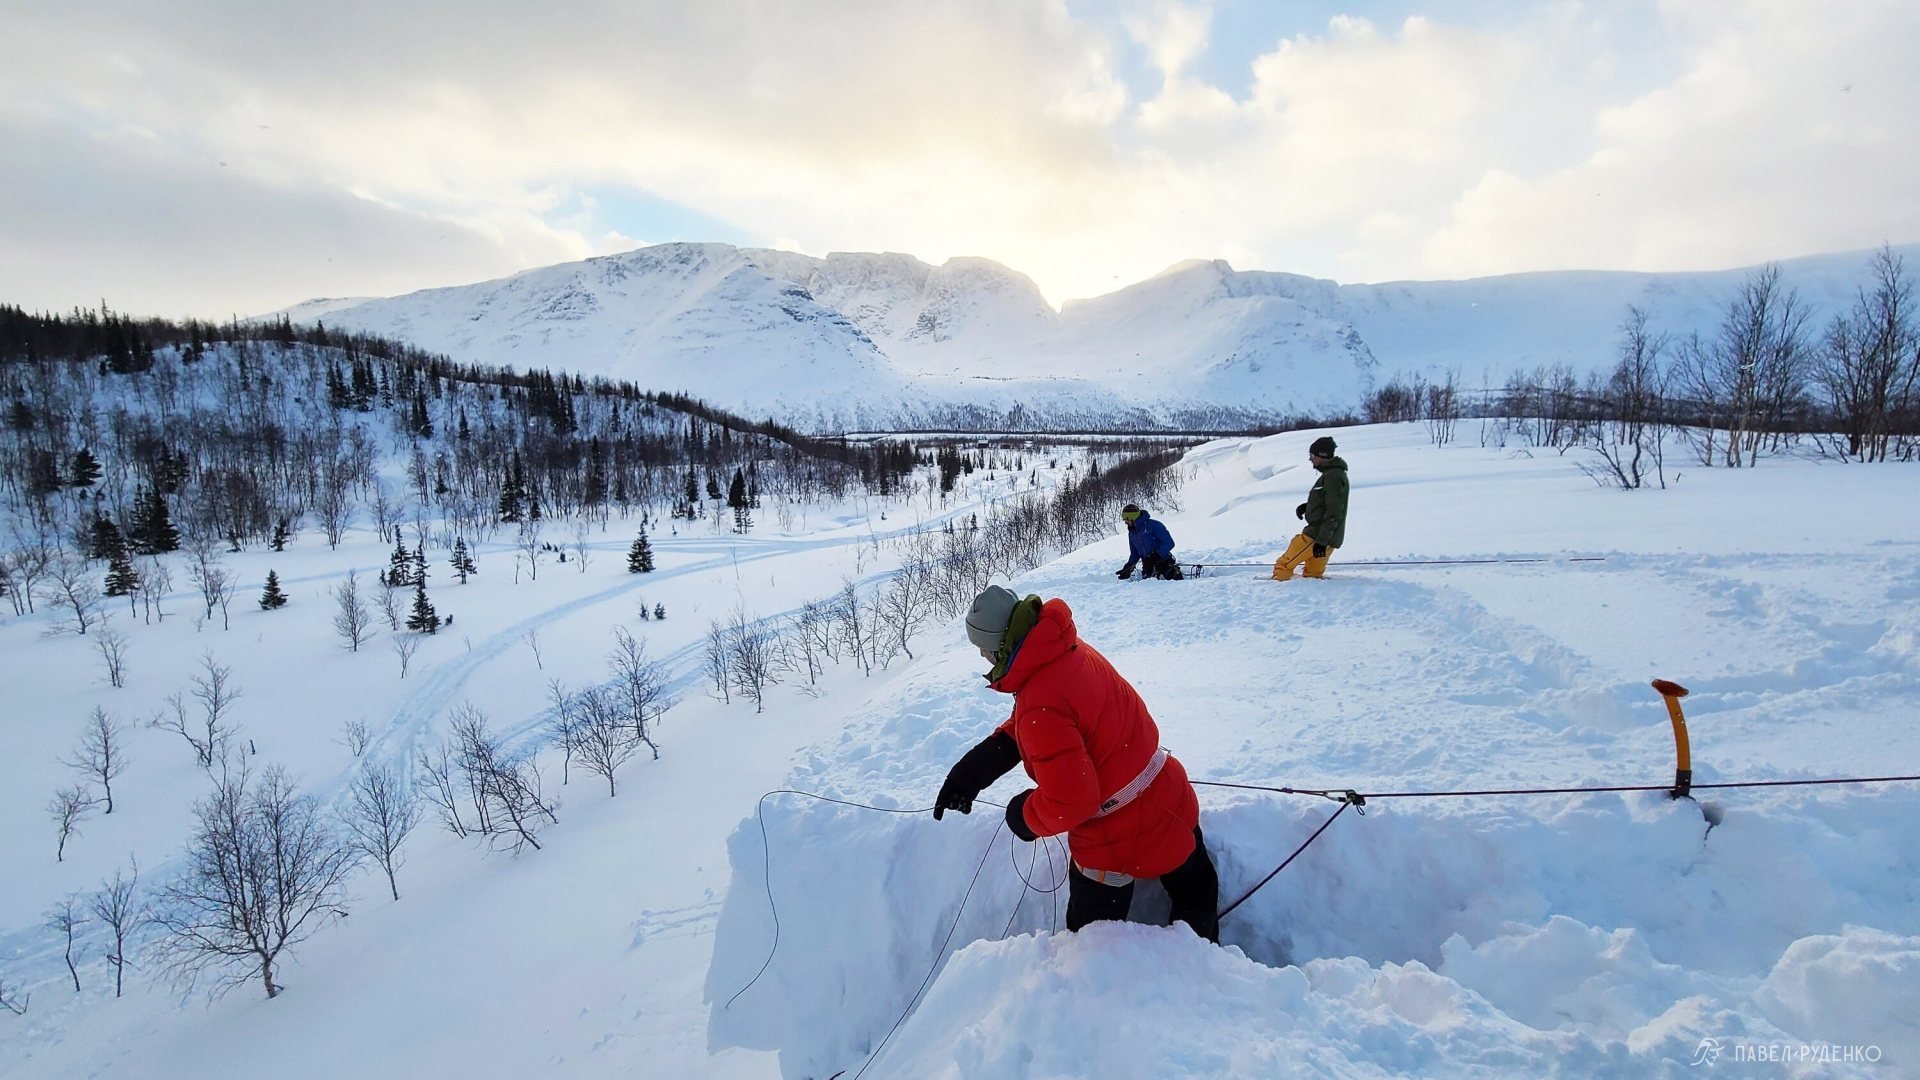
Beacon, minimum requirements: 3-antenna, digital. Practice using it. Do a beacon check before going out. Hold the beacon parallel to the slope while searching with a cross.
Everyone in the group should have a beacon. If this is not possible, some participants on a ski hike can use the Pieps TX 600 transmitter. It was developed for use by dogs or in carrying loads on packs, as it only transmits a signal on a special frequency. Use is possible according to the following principle: in a group of 6 participants, 2-3 have full-fledged Pieps beacons, 3-4 have Pieps TX 600 transmitters. This allows maintaining the safety of the group in case of an avalanche, as usually, one person searches with a beacon, thus reducing the cost of equipment. The sensor costs 4-5 times cheaper than the beacon.
Probe 2.6 — 3 meters, aluminum. With easy fixation, without any knots on the rope.
Shovel, aluminum, folding, with the right handle for mittens or gloves.
Also, in domestic tourism, the use of an avalanche tape made of bright satin, synthetic material is developed so that it doesn't absorb moisture. The length is usually 15 meters, each meter indicates a division, every 25 cm, an arrow towards the participant. Such a tape is made independently. This is a budget and working method. According to one Western statistics, the chances are about 40% to find and save a person from an avalanche.
Causes of death in an avalanche:
- 74% asphyxia
- 25% injuries
- 1% hypothermia
The survival threshold in an avalanche is 80% when rescuing a person within 10 minutes, after that, the chances drop catastrophically. Time plays an important role, we train to rescue within 5-7 minutes.
Route selection
How to determine if a pass slope is safe? First of all, this is worked out at the route planning stage. Passes with a slope of up to 30% are quite safe. We pay attention to the sides and whether there are cornices, the chance of natural avalanches.
Choosing a pass ascent should be as conservative as possible, as the ascent takes a lot of time, which means the risks increase significantly. If the slope is more than 30%, dig a snow pit.
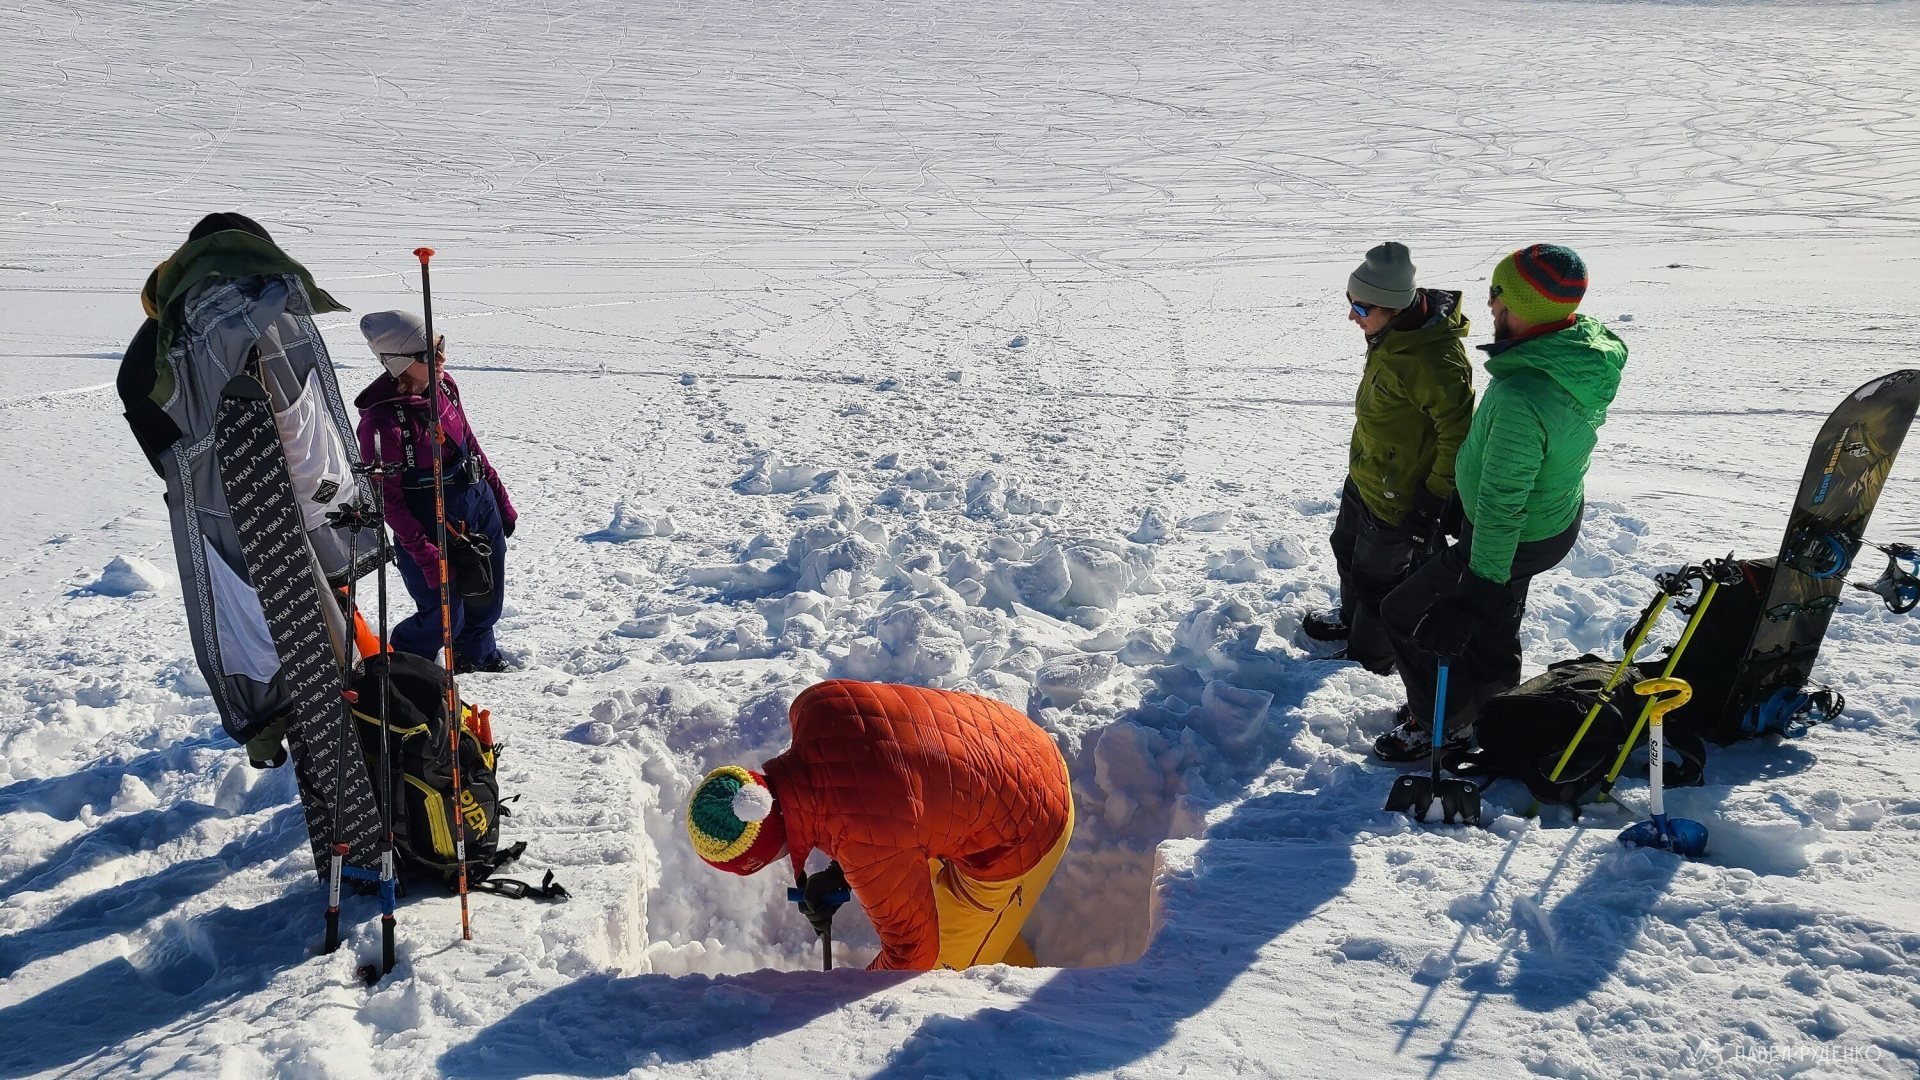
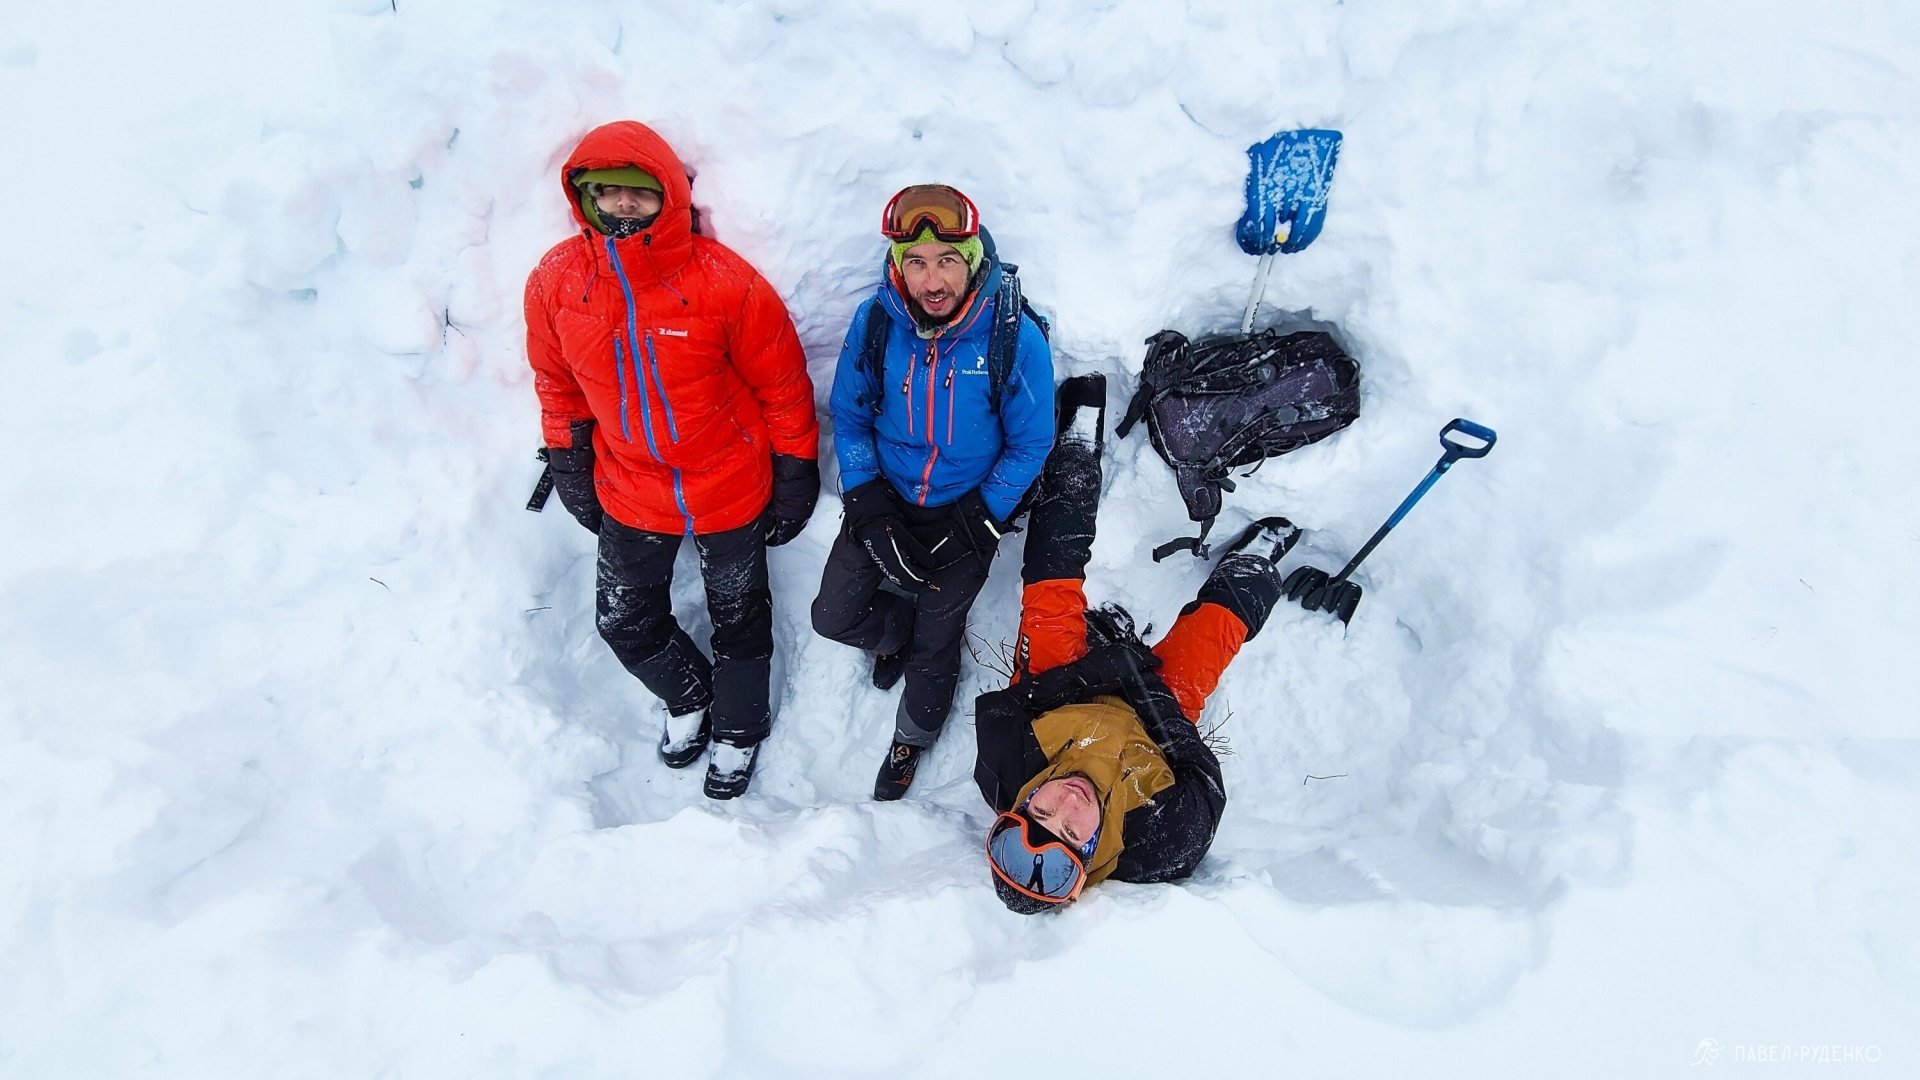
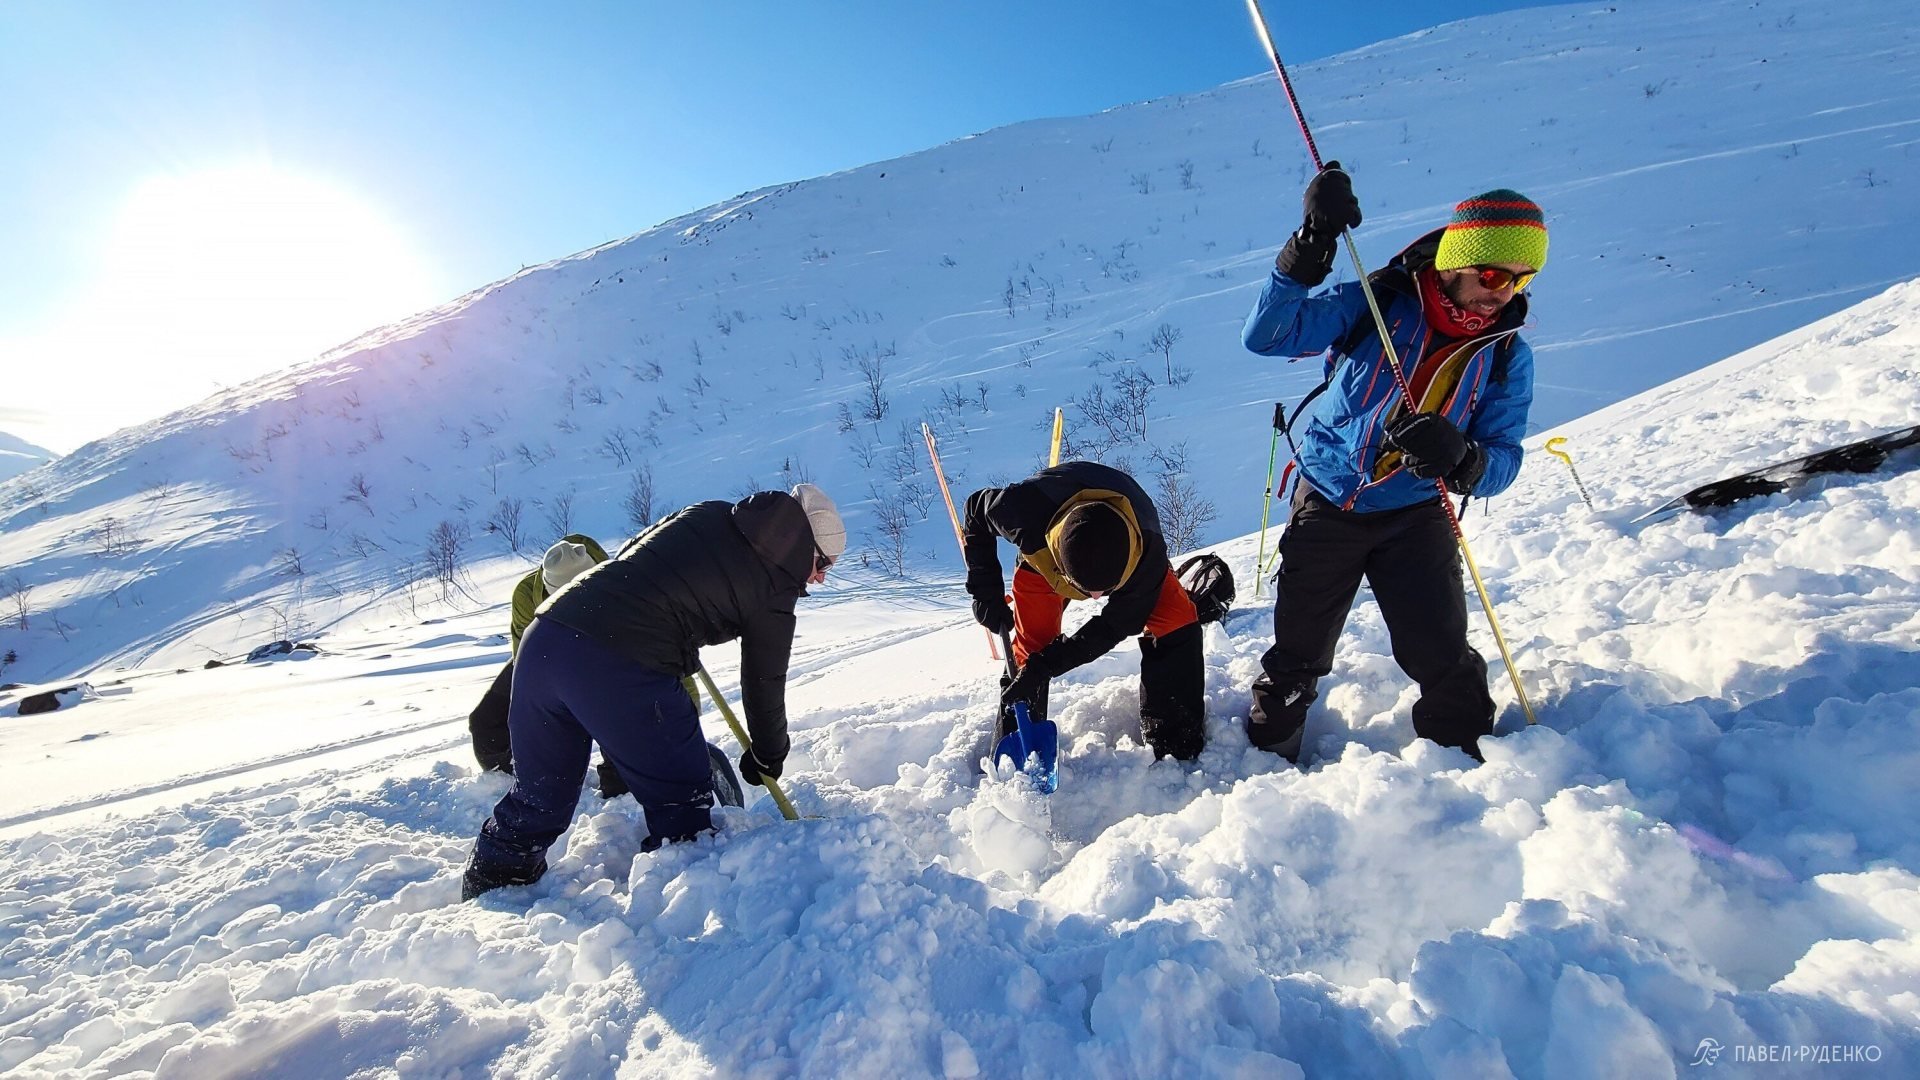
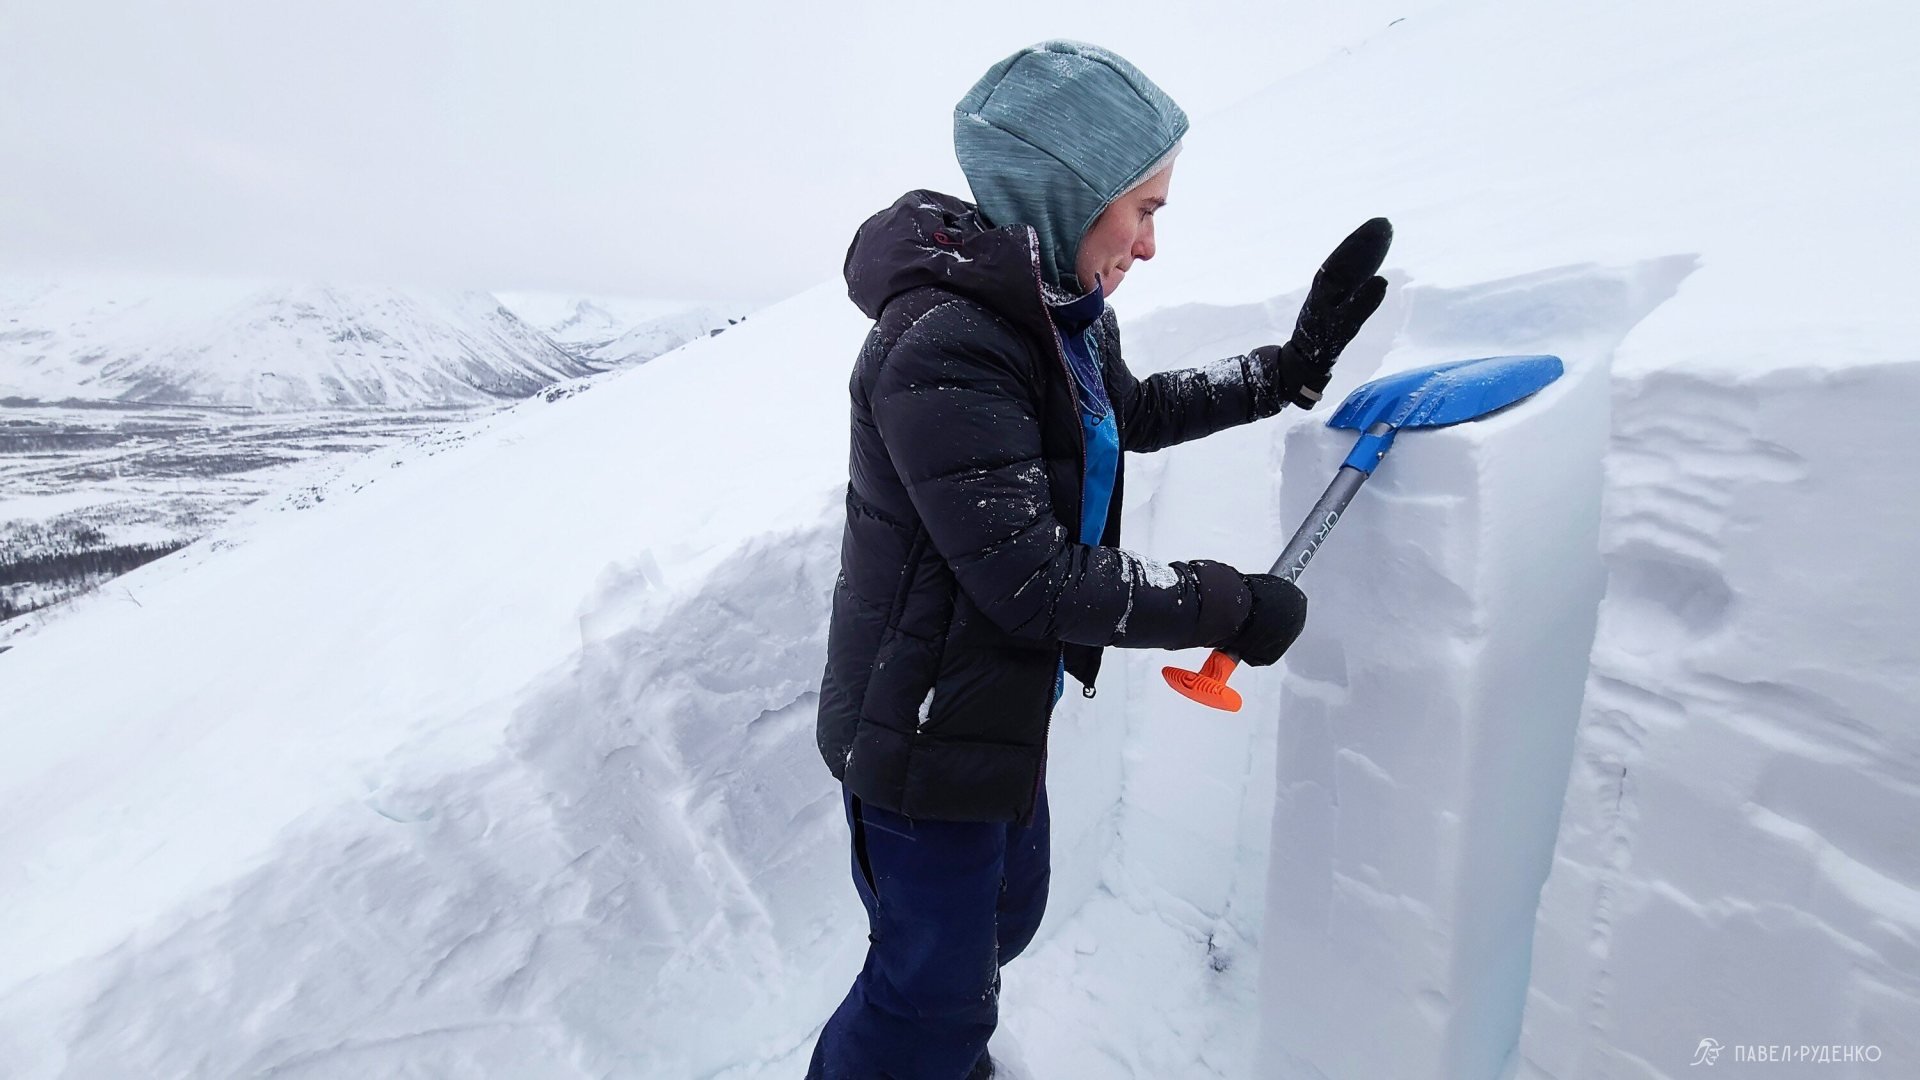
Snow pit
A snow pit is a dig in the snow for monitoring the condition of snow cover and identifying avalanche-prone layers.\n<\/p>\n
It is important to choose the right place for a snow pit; it is relevant only for the given slope exposure and 400m vertically down the slope, with a radius of no more than 5 km.\n<\/p>
Do it in a safe place, not in an avalanche source, not under an overhang, not above terrain traps, not above people. If there is a group, it is better to post an observer. An indicative place for determining avalanches.<\/p>\n\n\n
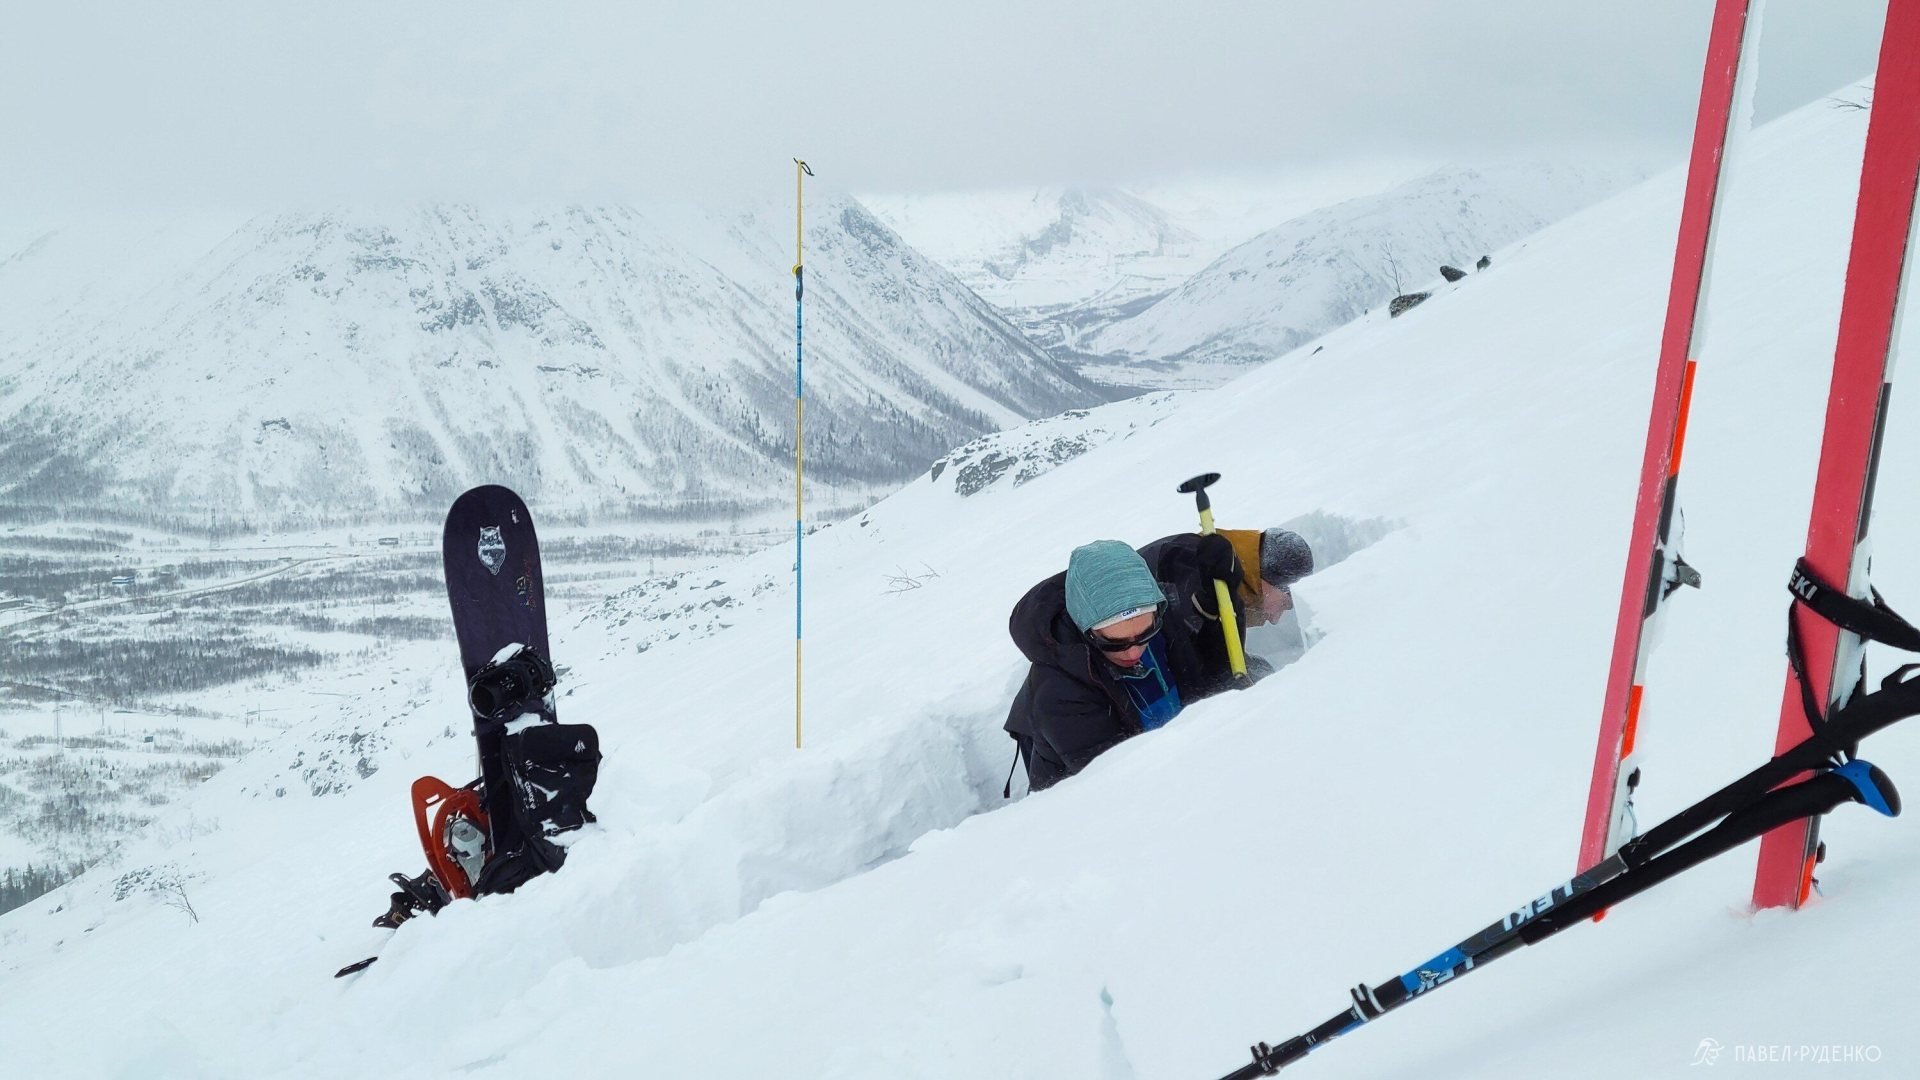
When digging a snow pit across the slope, we throw the snow back so that there is no wall behind. 90x30, smooth walls. Work with gloves, check for penetration into the snow, into the side wall on the shady side. Identify significant layers, record the data.
\<\/p>
A snow pit should also be done when weather conditions change, every 5-7 days the snow cover can completely change.\n<\/p>
Allocate time for the snow pit, do it off the trail, take into account the past weather, the current weather, and the forecast. Work in pairs, take into account the microterrain. Cover up the snow pit.<\/p>\n\n\n
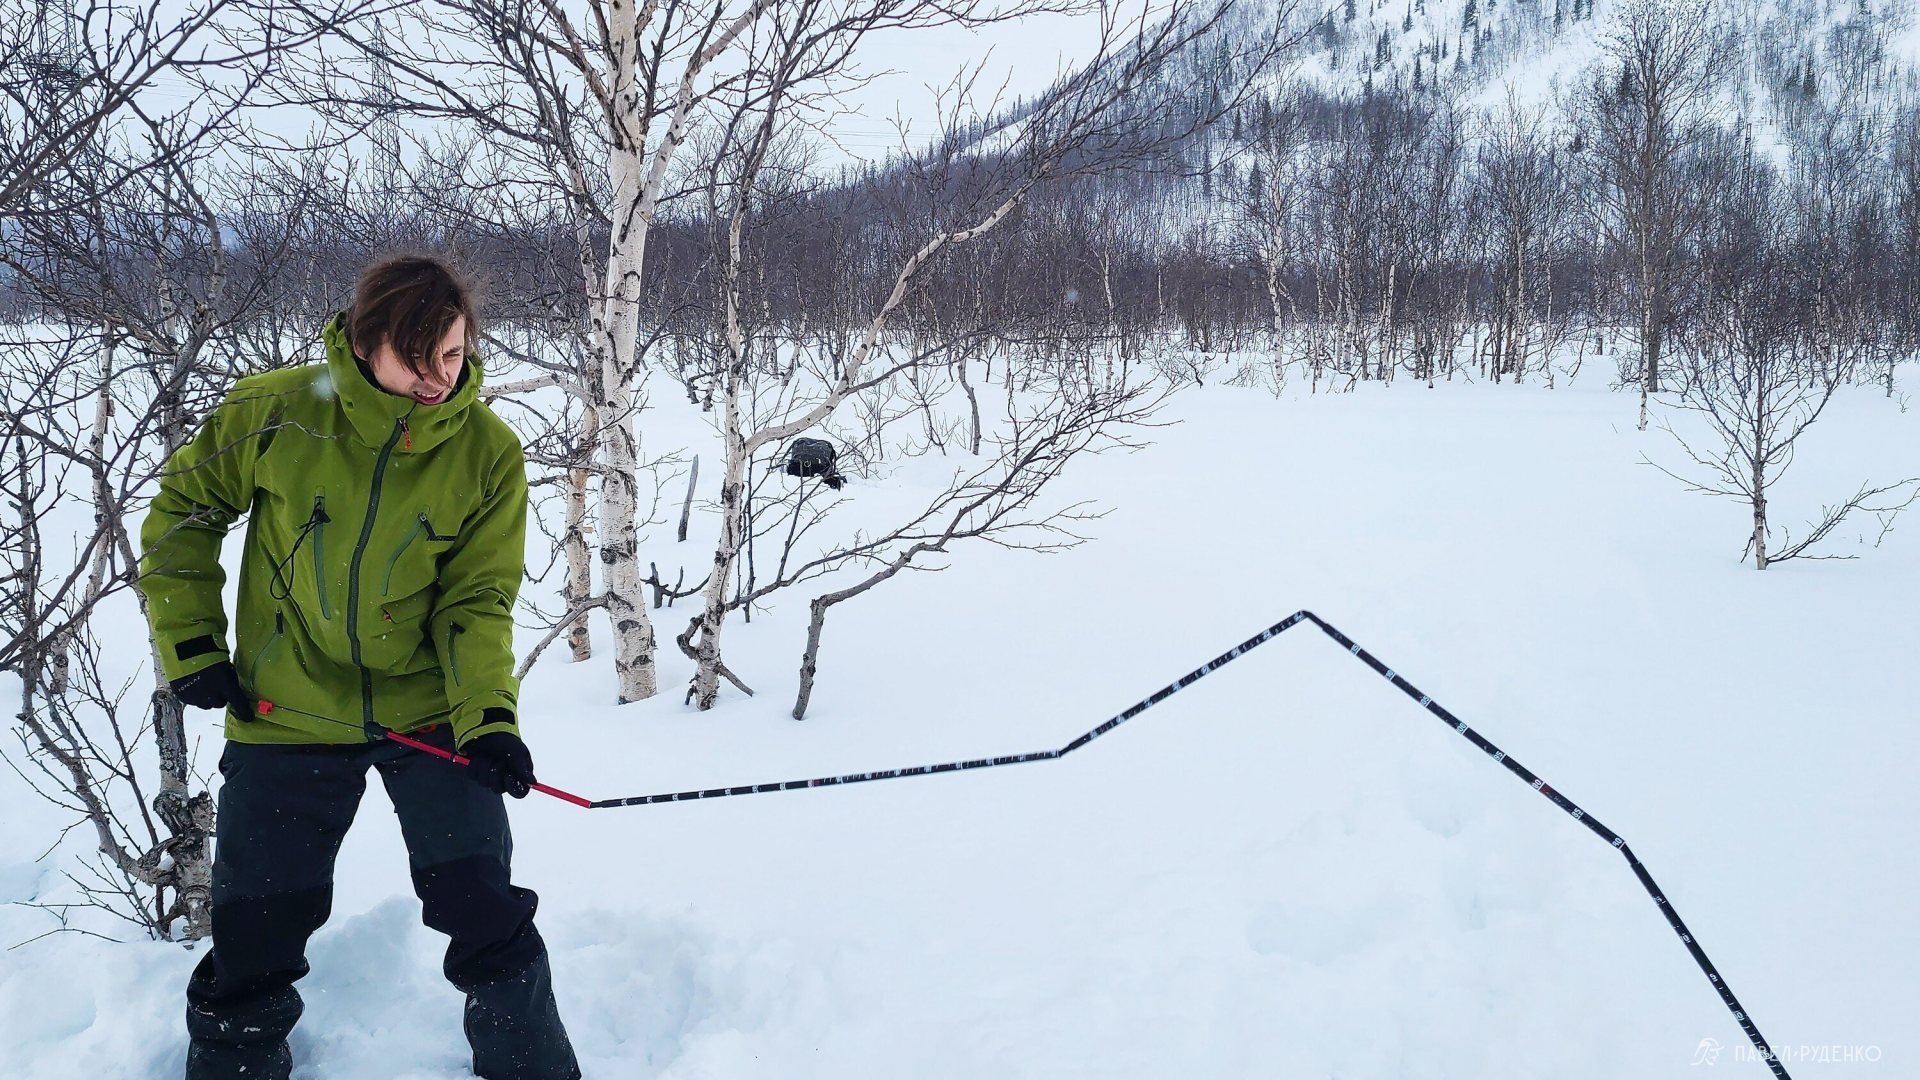
Quick tests
Often there is no time and opportunity to do a full snow pit, so there are quick tests that allow you to make preliminary conclusions about the avalanche situation in the shortest possible time.<\/p>
<\/p>
- Ski pole test. Determine the amount of soft snow, its strength, if it collapses, then loosening of the layer from below.\n<\/li>
- Ski tour test, when moving upward in a zigzag, apply load to the snow with your weight in the corners.\n<\/li>
- Hand shear test, this is a simple test to assess the parameters of shear and tear strength of snow, done in a couple of minutes with a ski pole.<\/li><\/ul>
<\/p>
Cornices
Form after a blizzard.\n<\/p>
Don't get too close from above, you will fall with it.\n<\/p>
They fall on the first sunny day after a blizzard.\n<\/p>
When collapsing, they can trigger an avalanche.\n<\/p>
In some rare situations, you can cut down a cornice with self-insurance.<\/p>
Conclusion
The training is very worthwhile, there is a lot of information. Everything is structured and clear. Now I understand the snow better, and it understands me) I consider it mandatory for all ski tourists and climbers who go to avalanche-prone areas. I don't mention ski touring and freeride, because for them, this should already be a given.\n<\/p>
Take care of yourself and go in winter, it's awesome!<\/p>

